Step 18a – Deck Ledger and Footing Forms
I figured that the most accurate way to position the footings for the deck would be to assemble the frame, ensure it is level and square, and then hang a plumb bob down where the center of the post will be attached. To assemble the deck frame, I had to first attach the ledger. I measured out the locations of the joist hangers and nailed them into place. On the ends of the ledger, I used a special type of joist hanger that has nailing flanges that fold inward instead of out. This allowed me to place the joist hangers right on the end of the ledger. Next, I marked out the precise locations for the bolts that will hold the ledger to the rim joist of the house. The allowable locations of these bolts are marked out in excruciating detail in the building code.
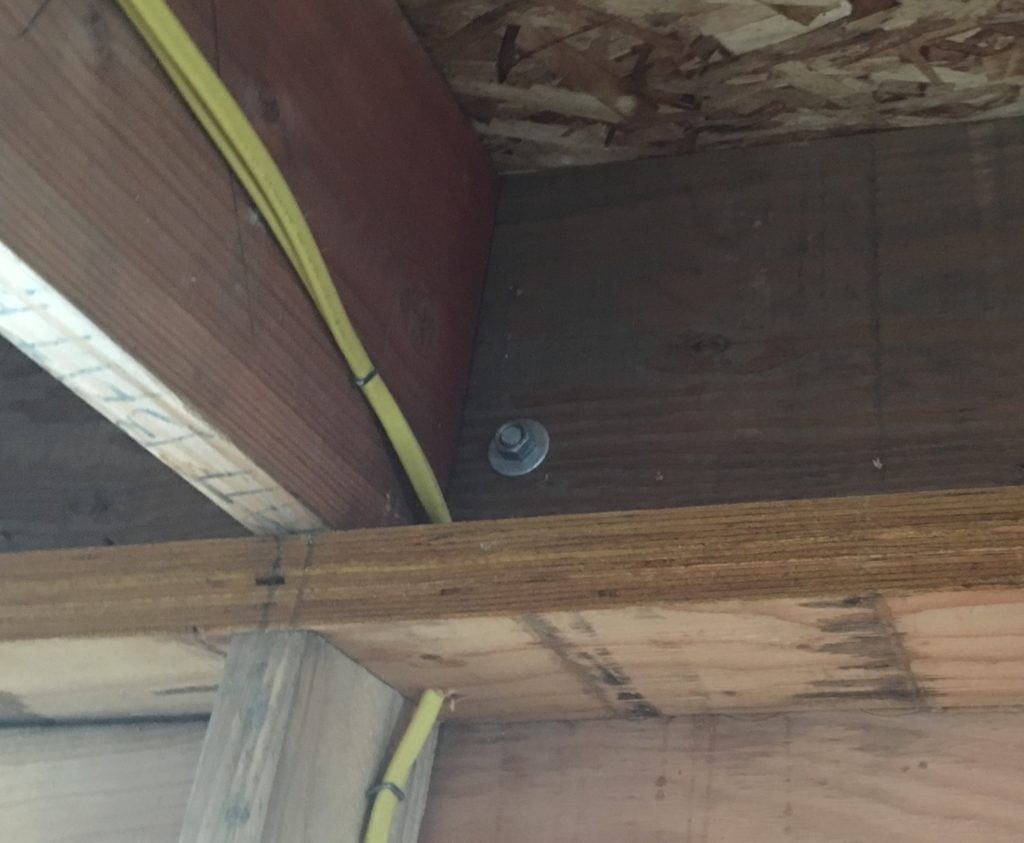
As you can see, they must be located at least 2″ from any edges of the ledger, alternate between top and bottom, and be a certain distance apart based on your joist span. In my case, that was a maximum of 36″. I drilled holes for the bolts and carried the ledger up a ladder to the proper location on the house. As I explained in a previous post, I had prepared this spot by cutting back the foam and furring strips and installing flashing. I carefully leveled the ledger and lined it up with the studs and then marked out the ledger holes on the Tyvek. I drilled out the holes through the Tyvek and rim joist the same size as I had drilled them on the ledger, and then threaded bolts through. I put a washer on the bolt side and nut side, as well as a stack of five washers in between the ledger and the rim joist to create a 1/2″ gap between the two. This will allow air to pass through the gap and dry out any water that may have made its way past the flashing. Then I went inside the house and tightened the bolts from the inside.
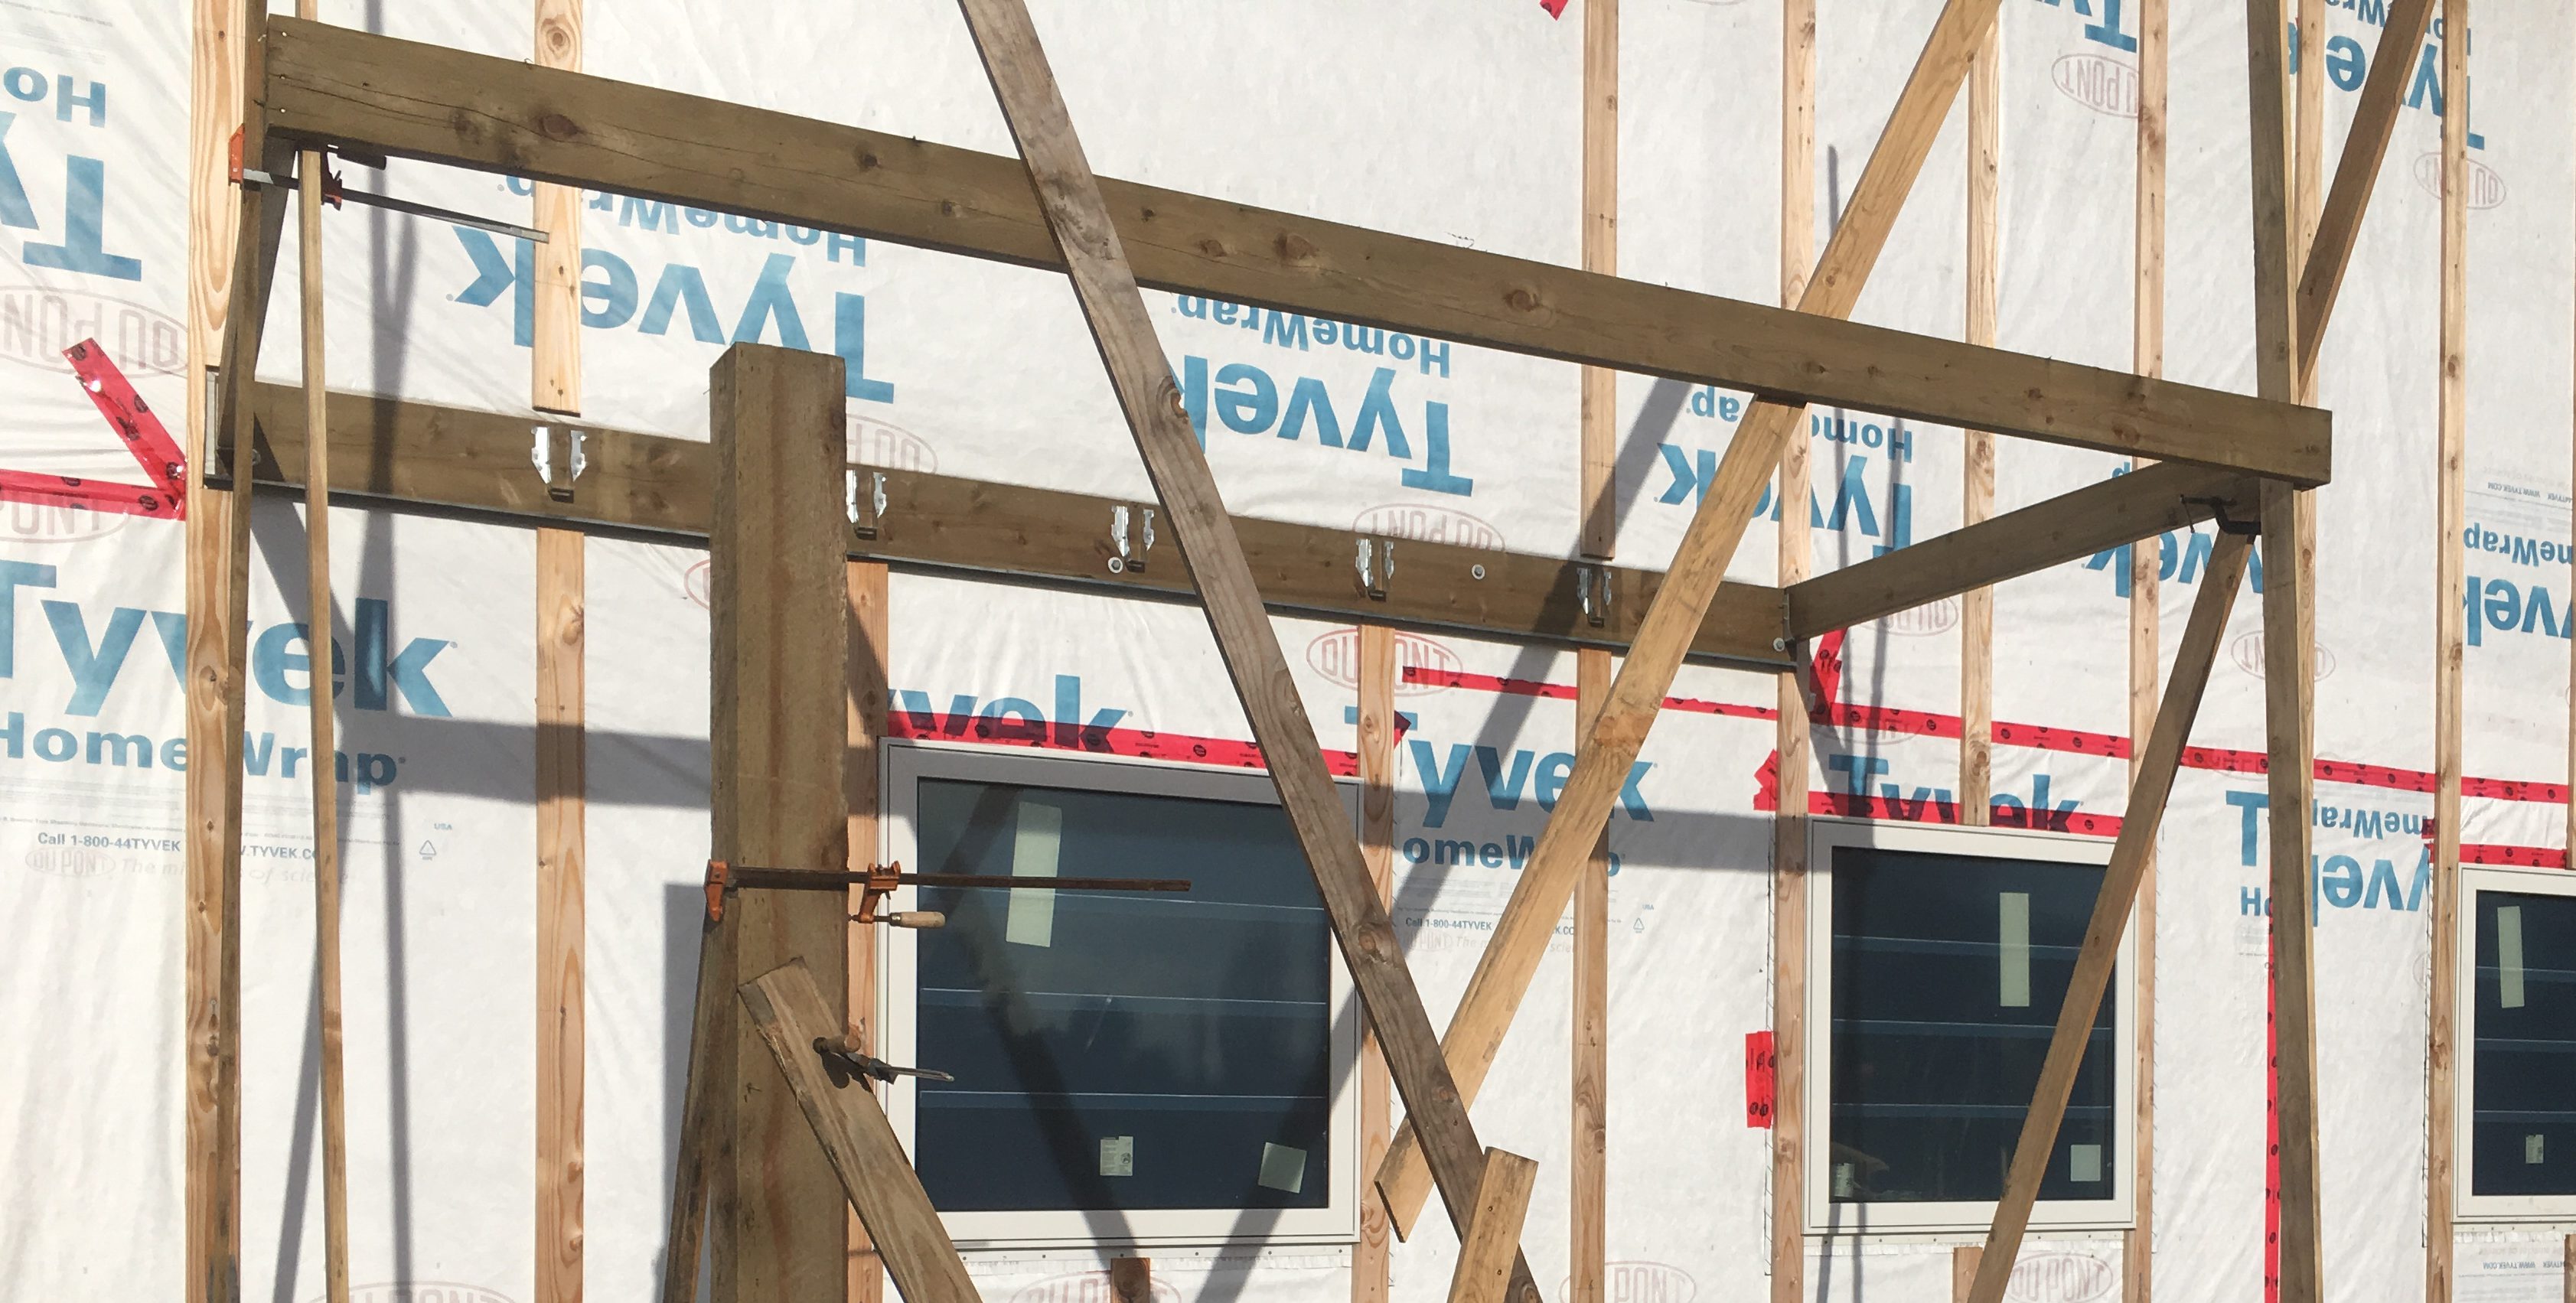
I nailed the rim joist to the ends of the outer two joists of the deck and then had a couple friends help me hoist it up and place the opposite end of the outer joists into the outer joist hangers on the ledger. I attached some 1×4 boards to hold it up and then made minor adjustments until it was level and square. I used a few scrap boards to ensure the 1×4 bracing would hold the deck frame in place until the footings and posts were assembled. Here you can see the frame with plenty of bracing and also one of the 6×6 posts as I check the positioning.
Next, I used a small block attached to the rim joist to mark the spot where the center of the post would attach and then hung a plumb bob down so I would have an idea of where to start digging. It is important for the footings of the deck to be deep enough to extend below the frost depth, which in my area is 18 inches. I dug a hole about 15 inches across and went down about 30 inches total. This gave me enough room to put a 6″ layer of gravel at the bottom of the hole for drainage, and enough space to level the form properly.
I bought a 12″ form that comes in a 8′ length. This gave me 4′ for each of the footings. I measured down from the deck frame to ensure that the top of the footing was at the correct height. First there is 5.5 inches for the rim joist, then 7.5 inches for the beam, and last 8 feet for the post, for a total of 9’1″. The top of the footing can’t be any lower than that distance from the top of the rim joist. I cut the cardboard form so it would extend from the bottom of the hole to that point, then put it in the hole and leveled it. I backfilled dirt all around it to support it and then repeated the process for the footing on the other side.
I checked the weather report to ensure there wouldn’t be any rain and then made sure I had enough concrete to pour the footings. Most concrete bags very clearly illustrate how many cubic feet a bag will fill. To calculate the volume of the footing, simply square the radius and multiply by 3.14 and the depth. You can mix up to 2 bags at a time in a wheelbarrow, just adding water and mixing with a hoe until it is the consistency of thick oatmeal. Then just use a shovel to spoon the concrete into the form. Once the form is half full, use a metal bar or stake to push the concrete around and ensure there aren’t any air bubbles. After the form was filled to the top, I hung the plumb bob again and stuck an anchor bolt into the concrete precisely underneath the plumb bob. Then I used a trowel to round off the concrete at the top of the form.
After the forms had set for a few hours, I used a trowel to give a nice finish to the top, and then after a full 24 hours had passed I removed the portion of the cardboard form that was visible.


Advice? Questions? I'd love to hear your feedback or help you out in any way I can!