Step 13a – Install the Plumbing

Once the DWV has been planned out, installing the plumbing is a relatively simple process that involves drilling holes in studs and joists, cutting the pipe to fit, and cementing the fittings to the pipe. The key is to always remember the old plumbing sage’s advice, “Don’t be a dope, slope”. Every drain pipe must be angled so that it descends towards the septic (or sewer) at the rate of 1/4″ for every foot of pipe. Vent pipes, on the other hand, should be installed level, or with only a very slight slope toward the drain. Flexible metal straps must be used to attach the pipes to the framing at least every 4 feet on a horizontal run. This will ensure that the slope is maintained even if the pipes get jostled in any way.
I had already installed the drains for the first floor way back before I poured the concrete. Furthermore, I had installed all of the vents and drains that ran through the load bearing wall when I laid down the subfloor. This left very little plumbing to complete on the first story – basically just the stub-outs and vents for the kitchen and bathroom sinks, and excavation of the tub and toilet drains.

Sinks stub-outs are typically placed at 19″ above the floor level. I attached a test cap to the end of each stub-out, and once the entire DWV has been installed, I will fill all of the pipes with water to ensure I don’t have any leaks, just how I did before I poured the concrete. If the water test is successful, I will cut off the test caps and install the traps for the sinks. After the stub-outs, the pipe continues as a vent up to the second story.
One of the last things I did before pouring the slab was to place a cardboard box around the tub trap and fill it with gravel. A thin layer of concrete had been skimmed over the top so the box was now completely invisible. I lightly took a sledgehammer to the spot where I knew the outer edges of the box were, and it cracked away pretty easily. Once the thin layer of concrete was removed I was able to scoop out the rocks and uncover the trap. I was pleased to see that it was exactly 15 1/2″ from the wall which placed it right in the center of the tub. Later, I will use some leveling compound to ensure the area below the tub is perfectly level, and then connect the trap to a “tailpiece” that will connect to both the drain and the overflow for the tub.
Likewise, a thin film of concrete had covered the drain for the toilet (also called a closet bend). I had to chip it away so that I could align the metal ring correctly. If you look closely, you will notice that there is a groove on each side of the ring where a screw can be inserted and then rotated so it locks into place. We want to ensure that if we drew an imaginary line between the ends of those grooves, it will be parallel to the wall. You can see two mistakes I made below that took place during the concrete pour. The water supply for the toilet should come up inside the wall, but perhaps I didn’t secure it well enough and it got jostled during the pour. I will end up just plumbing it up out of the floor instead of out of the wall which is the standard practice. Most likely nobody will notice. The other mistake is that the toilet flange is supposed to sit up a quarter inch or so above the concrete so that after the tile is set in place it is sitting on the tile. I will most likely have to cut it off, go out and buy a new one, and reattach it. If I leave it as is then the connection between the toilet and the flange will need to be filled with an extra wax ring or a spacer. Both methods are widely used but neither is as safe as just installing the flange at the correct height. When it comes to the possibility of dirty toilet water leaking, you can never be too safe!
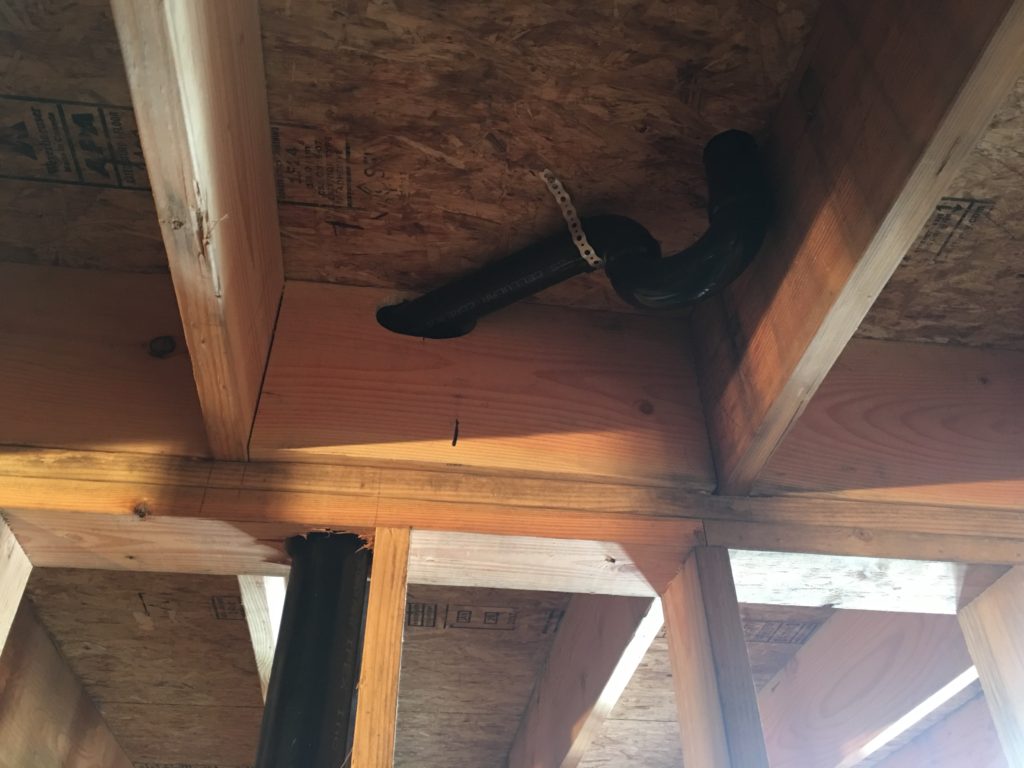
For the second story, the drain pipes run in between the floor joists just under the subfloor. I drilled holes in the top plates of the first story walls and then installed the horizontal drains between the joists. There was just enough space to ensure they were adequately sloped.
Continuing up from the second story drains were the second story stub-outs and vents. Below is the stub-out for the washer and dryer. You will notice there are two drains, one for the washer and one for the ventless dryer. Instead of the moist, hot air escaping to the outside with a normal dryer, the heat stays in the house and the water drains out just like the washer water.
In addition, there were stubouts for the shower, two sinks, and another toilet. The closet bend for the second story is screwed down to the subfloor once it has been aligned in just the same fashion as the one on the first floor.
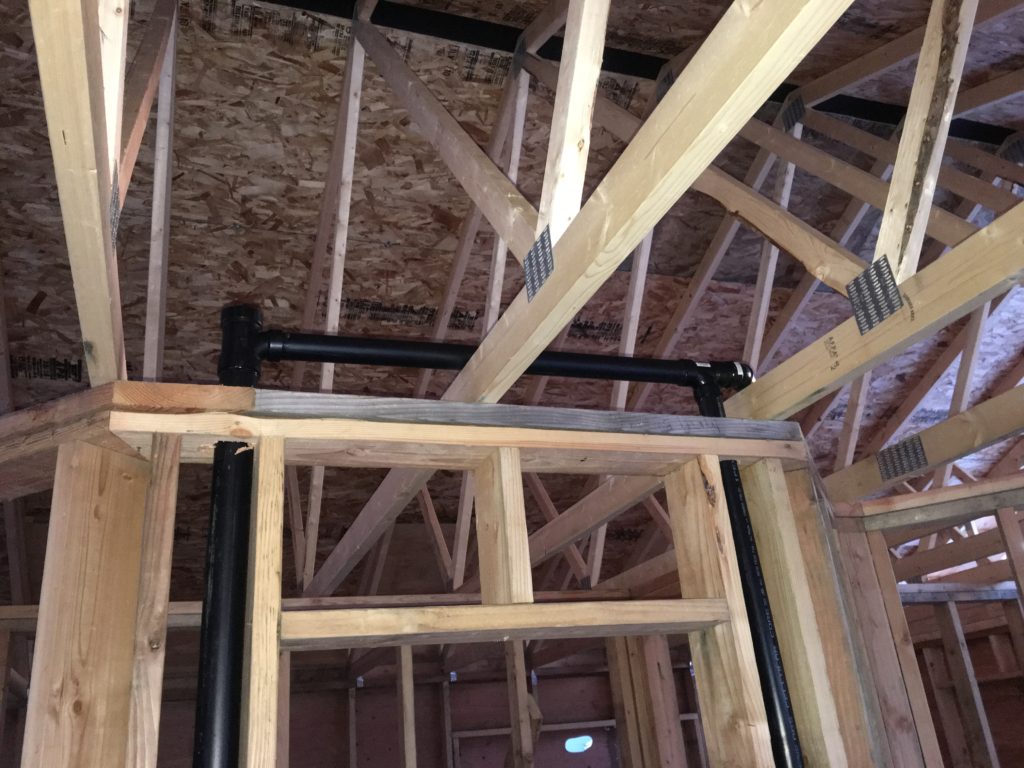
After the stubouts, the vents continue up through the walls and connect above the bottom chord of the trusses. To satisfy building code, at least three of the vents must continue through the roof.


I am interested in the ventless dryer. What brands are available to you ?( I’ve never seen one up here although they may exist) During summer where does the heat go?
Cheers!
Richard, as far as I know there isn’t a system that differentiates between the seasons, although that would be intelligent! Living in a predominantly heating climate, I’m not too concerned about the operation of the dryer in the summer. If it becomes an issue I can just operate it at night, but I don’t have an operable window in the vicinity so I suppose it could be a potential issue (although one of the HRV vents will be directly above). Check back in a year or so and find out how it worked!