Step 6d – Prepare for the First Concrete Pour

I passed my footing inspection today, which means that I am approved to move forward with building my own foundation. The inspector verified that my setbacks were correct and also leaned on the forms a bit to make sure they were sturdy. He also made a visual inspection of everything to ensure that the dimensions were correct. Overall it was a pretty easy process. He signed my building permit and was gone after less than 10 minutes.

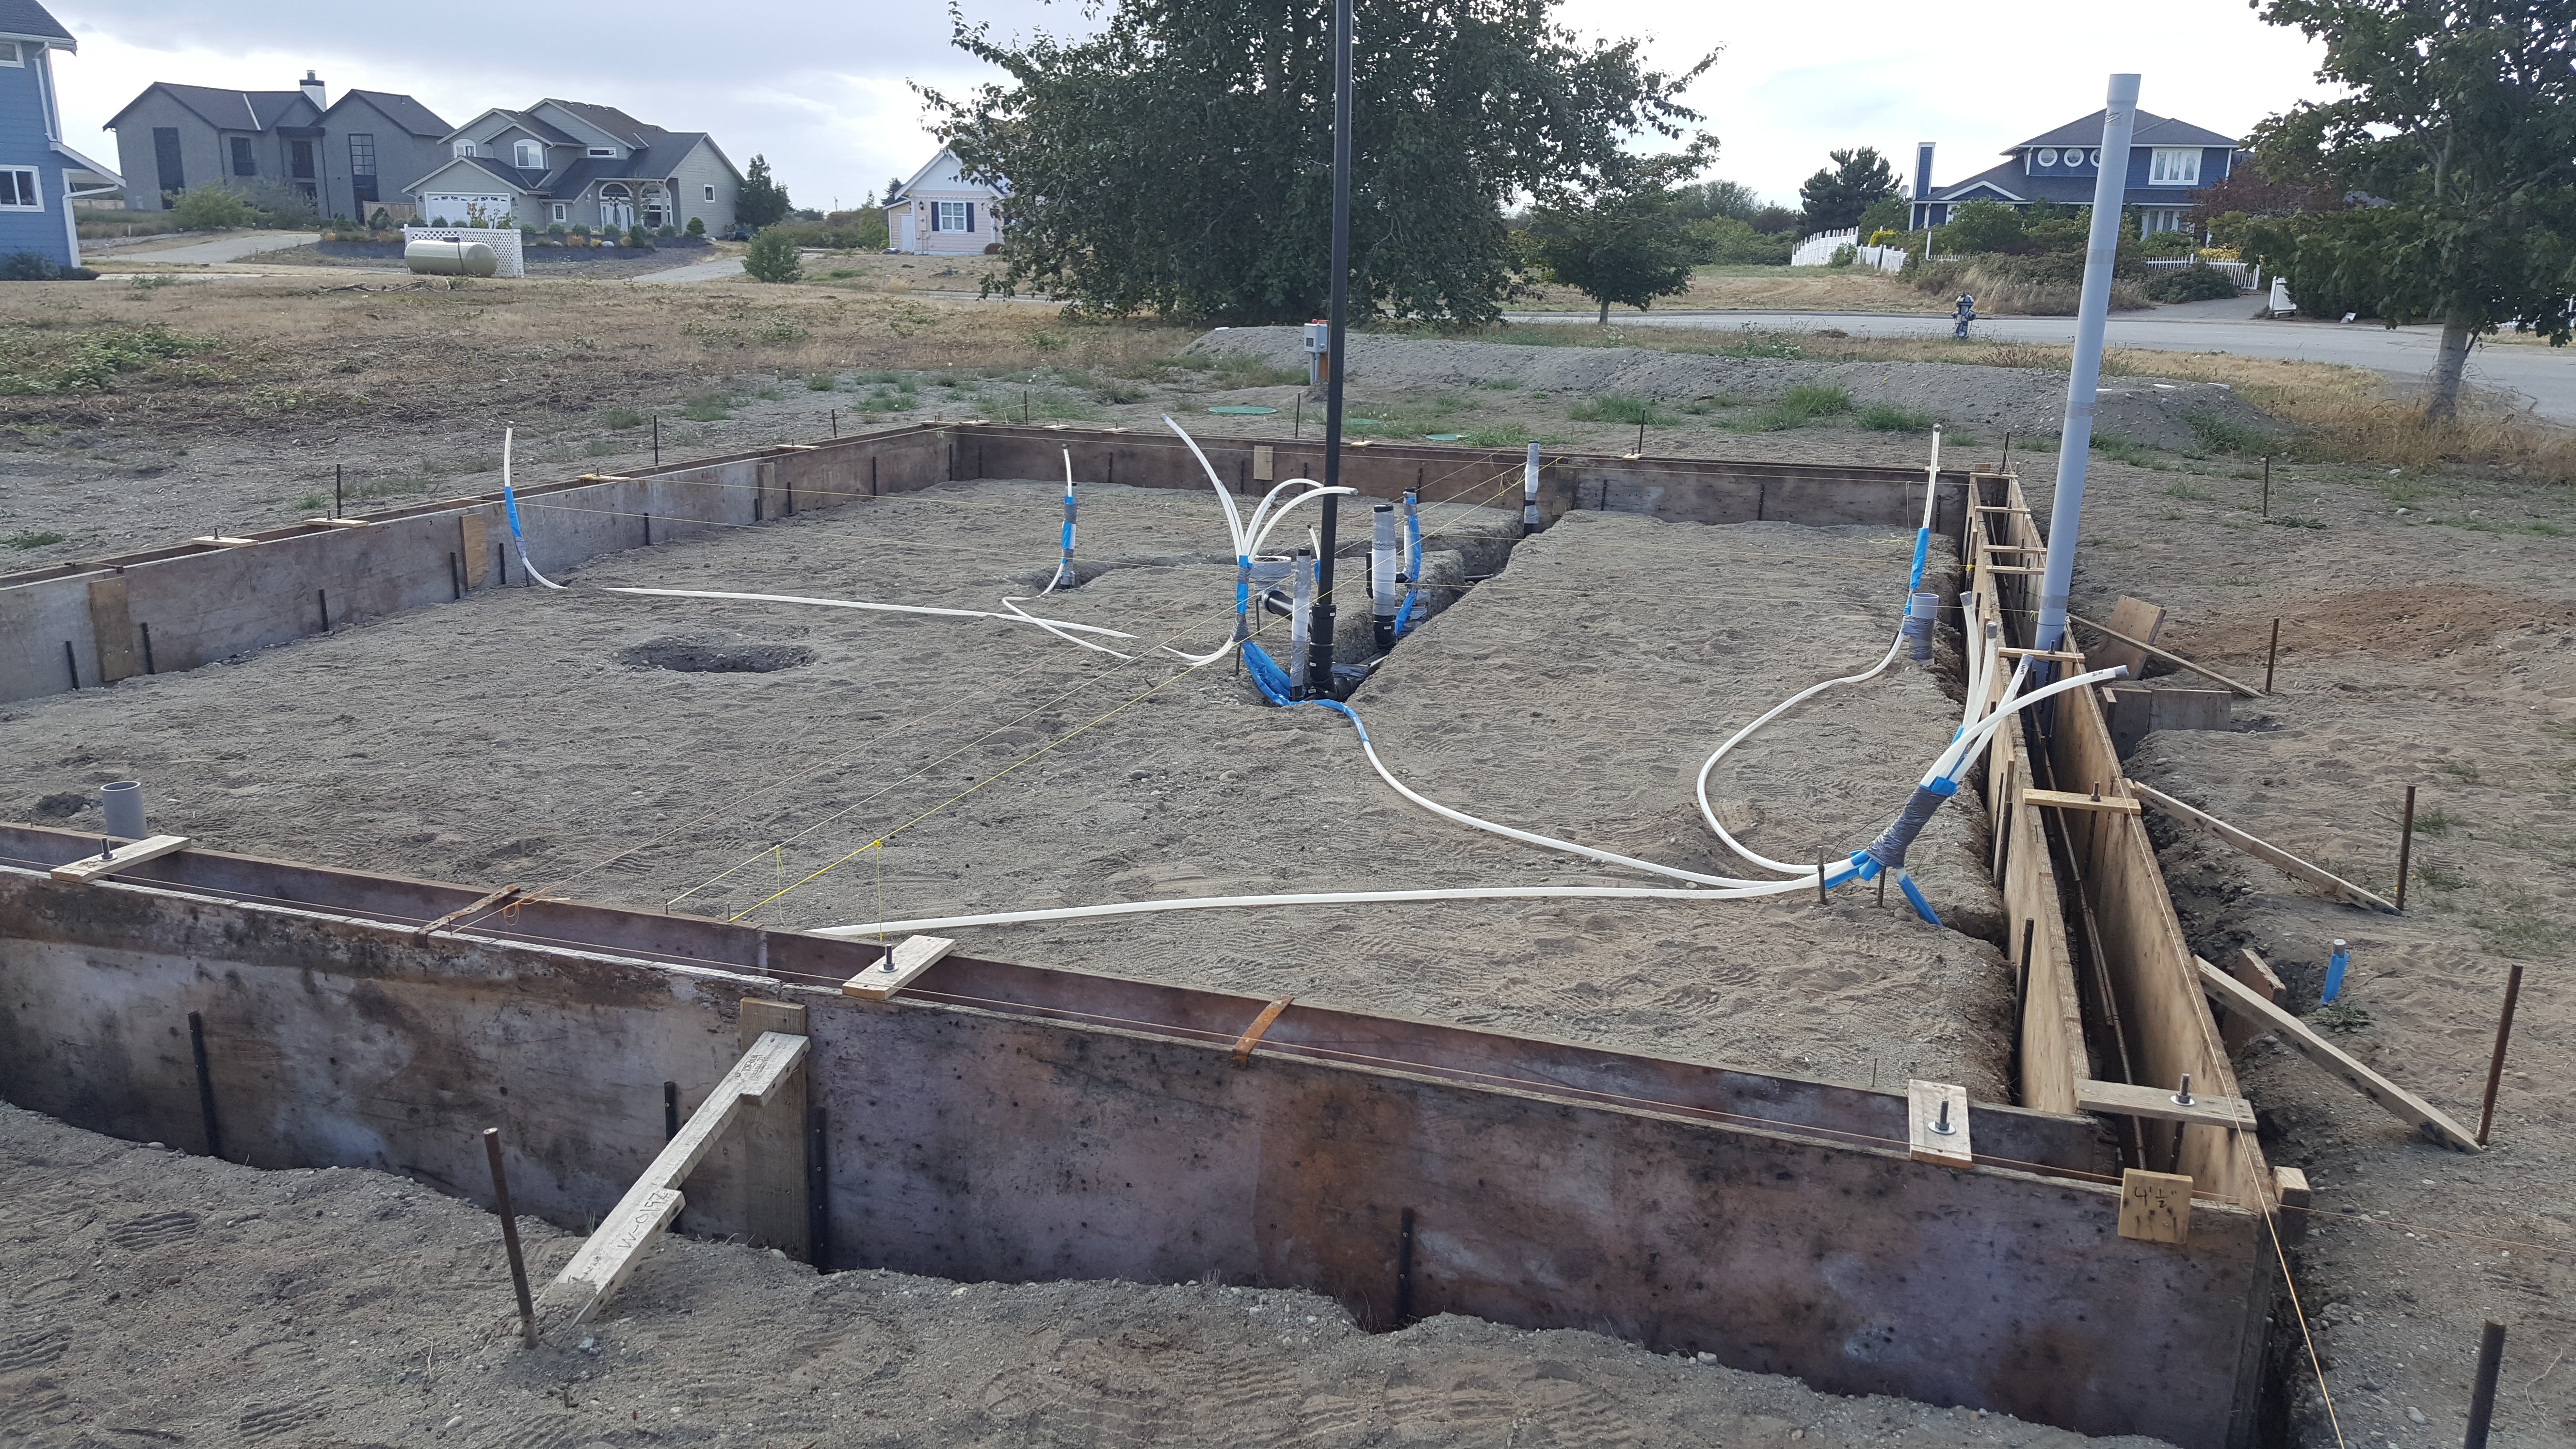
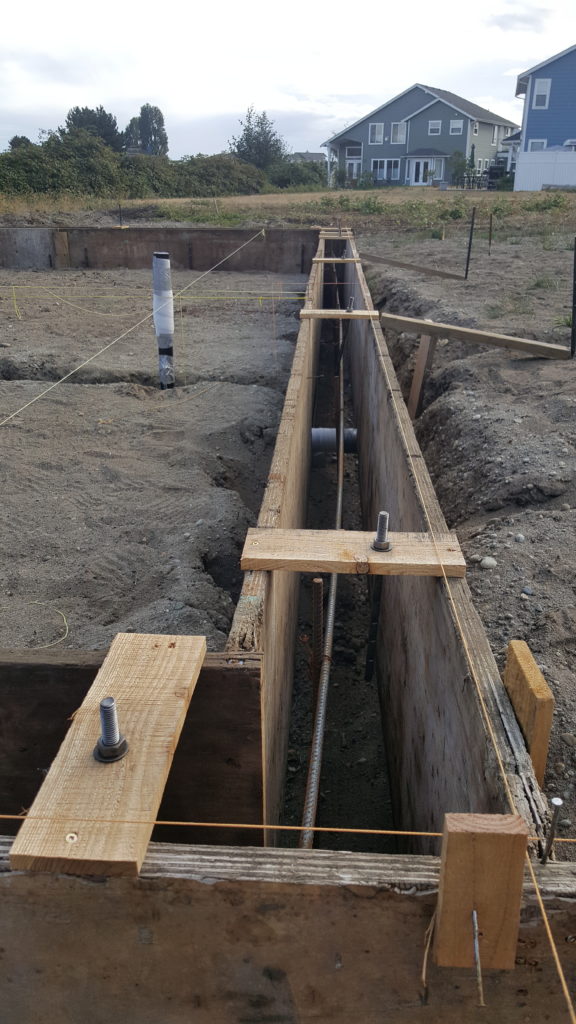
Over the last few days I had completed the final steps in preparation for the inspection. These included forming the small point load footing for the stairway, laying out all the cold water supply lines, and setting up the utility sweeps for the main electrical, internet, and ductless mini split systems. I also made a few minor adjustments to the forms to straighten out the rebar and make sure they were precisely squared and leveled, and laid out the anchor bolts.

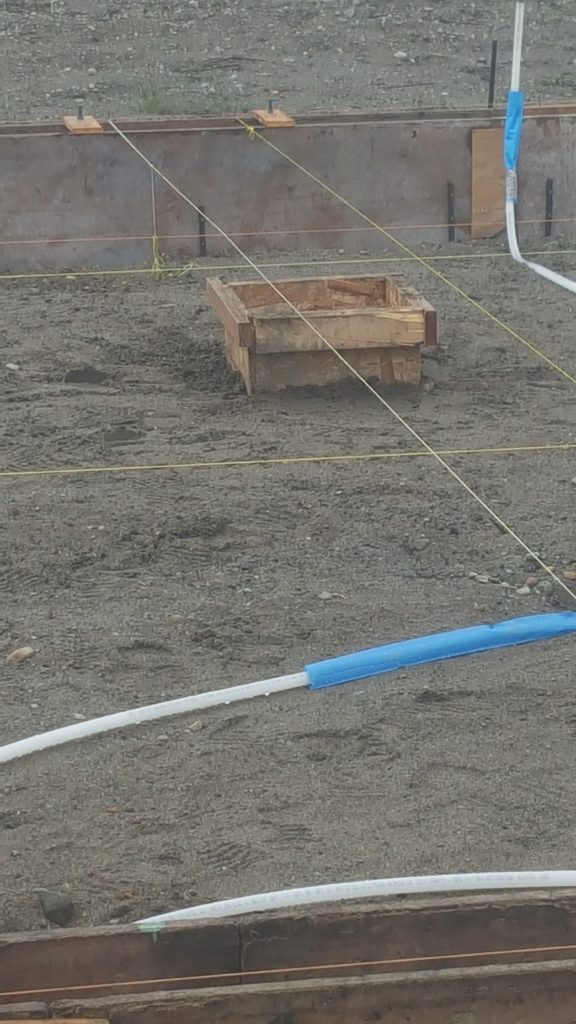
The inspector had made a small adjustment to my design during the permitting process. He decided that the foundation needed to be strengthened at one particular point where the opening for the spiral staircase put a lot of weight on two walls of the first level. At the spot where these walls intersected, he indicated on my plans that I was to pour a small footing under the slab measuring 16″x 16″x 10″. I built a form for those dimensions using some scrap 2×4’s and OSB, and lined it up at the correct spot so that the top of the form was 4″ below the top of my other forms. I will pour this at the same time as my footings and then remove the form. The 4″ above will allow enough space for the slab to be poured over it.

I’ll be running the hot water lines inside the “conditioned space” of the house, meaning that they will stay nice and warm at the same temperature as the house. The cold water lines, on the other hand, don’t need that level of insulation so I am running them underneath the slab alongside the rest of the plumbing I had already installed. I will be using a hybrid type of water supply installation for the cold water lines, meaning it will be halfway between the “trunk and branch” method and the “home run” method. The hot water lines will be almost exclusively home runs with one minor exception.

The trunk and branch method of water supply means that you have a main water line that travels through the entire house and wherever you have a fixture like a toilet or sink, the line for that fixture will branch off of the main trunk line. The home run method means that as soon as the water line enters the house it is piped into what is called a manifold, where it immediately branches off into as many lines as there are fixtures in the house. These branches pipe directly into each individual fixture. When dealing with hot water lines, the trunk and branch system has a major flaw in that if you want hot water in one of the fixtures and the water currently in the trunk has already cooled off, you have to wait until all of the water in the trunk has exited the fixture before you get hot water. This is not only annoying but also extremely wasteful. The home run method requires you to install more piping, but solves this problem, ultimately paying off in the long run. For cold water lines this isn’t an issue, so I just ran the piping as efficiently as I could to reduce the amount of PEX piping I needed to buy.

The last step was to set up the utility sweeps, or chases. These are conduits that are bent in 90 degree angles at very large radii, so when I am ready to run utility lines into the house I won’t need to cut a hole in the wall or reduce the amount of insulation I have in an exterior wall. The electrical sweep will house the main electrical lines for the house. The other two sweeps will house the refrigerant lines for the ductless mini split system as they travel between the heat pump outside and the fan inside, internet lines, and electrical going out to power the septic system and outdoor receptacles. I ran each of the sweeps from the location I had planned for each of them on an interior wall of the house down through the footing and out to the other side. I next cut some small pieces of plywood to ensure that concrete wouldn’t spill over and cover the end of the conduits.

Matt, I’m amazed, so you learned all of this in just 9 months shadowing/apprenticing w your contractor brother??
If someone wanted to learn what you know now, who should they shadow/work under for 9 months? E.g. What kind of contractor?
Thanks!!
It is very difficult to learn it all from one person (few exist) but I would say learning from a framer would give you the best bang for your buck. The framing crew is working on the house longer than any other contractors so an experienced one would know quite a bit about the other trades just by seeing them work. The major things you need to learn are framing, electrical, and plumbing. The foundation you can just design it really simple and use your framing knowledge to know what the end result should look like. I really can’t answer the question fully until I’m done building, though. I’m still figuring it out as I go!